Back in the fall on 2003, I had finished off a rather quick Deathstrike custom, based on the character as portrayed by actress Kelly Hu in the film X2: X-Men United. A short time later, the screenwriter of that film, Michael Doughtery, saw my custom and asked if he could commission me to make two additional pieces. One would be for himself and the other would be a birthday present for Miss Hu.
I was thrilled at the opportunity. It would allow me to go back and rework a custom I took too many shortcuts on the first time around, but I thought it’d also be fun to document its creation, every step of the way.
Michael presented the custom to Kelly in the spring of 2004, and she loved it. I had a blast working on the project, and look forward to working with Michael on future endeavors.
But enough of that for now. Below is a step by step guide on how to make your own Lady Deathstrike custom. Even if you don’t necessarily want to make a Deathstrike, the tips and techniques could be applied to any character, so have fun!

Step 1: Choosing the Base Figures
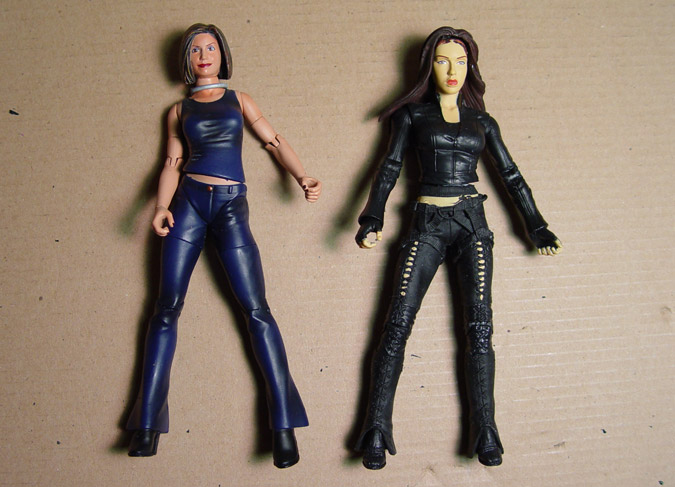
For this project, I initially thought the Max figure from the Dark Angel tv series was a good base for Deathstrike, but I quickly found her pants were made of a soft oily vinyl, which would make painting the figure impossible.
At this point I purchased a Cordelia figure from the Angel TV series figure line.She had the perfect pants that could be repainted to simulate skintight leather. Plus, her legs were just a hair longer, so she would add some much needed height to the overall custom.

Step 2: Slicing the Figure Apart
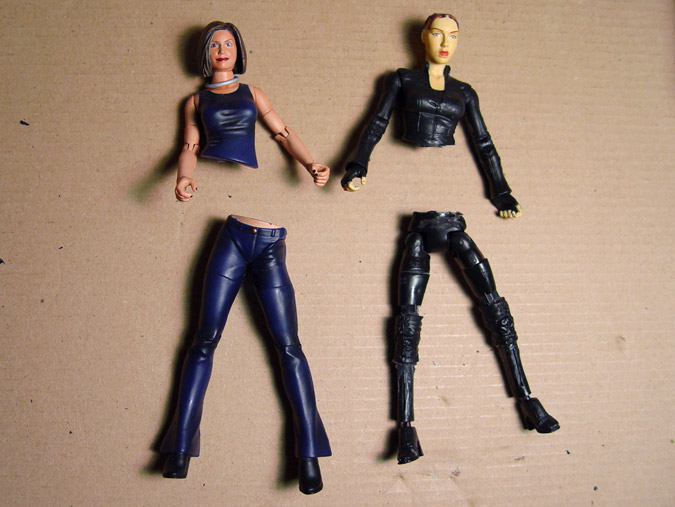
Using the saw cutting tool on my Dremel, I sliced though both figures across the waist, leaving a little more material on each of the parts than I might need. It’s always better to not cut enough off, rather than too much.
I test fit the Dark Angel torso on top of the Cordelia legs to make sure I was happy with the proportions, and trimmed the parts to make for a proper fit.

Step 3: Reinforcing the Connection
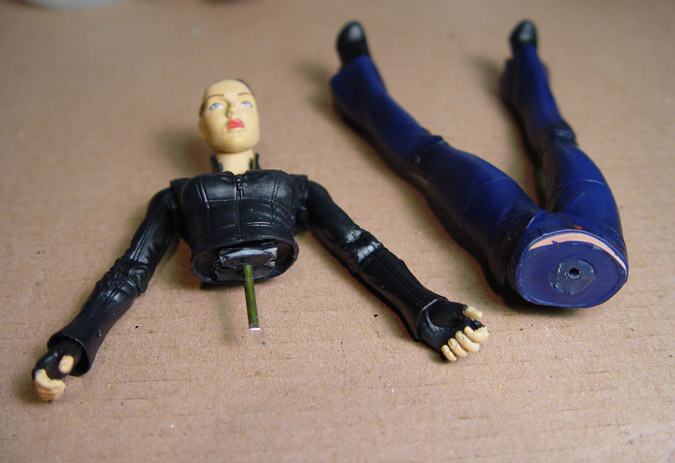
One technique for adding articulation is to drill holes into the two parts that require movement and then insert a metal rod. In this case, I used a wire coat hanger, trimmed to a short length.
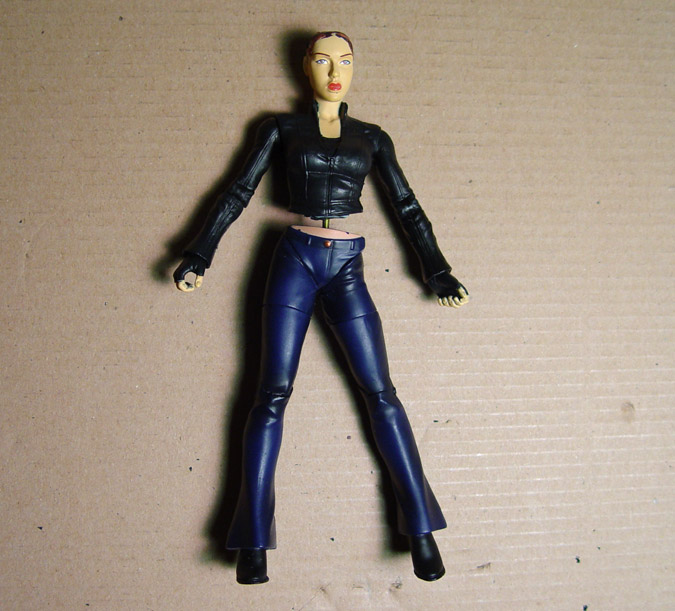
Even though the final figure would not have waist articulation, this is still a good technique for helping strengthed a bond between two parts. Plus, as I had to add a bit of height to the custom anyway, it helped me give a ‘spine’ to work off of.
So, basically this technique is good for a variety of uses. The coat hanger takes a bit of effort to cut through using wire cutters, but you can manipulate it pretty easily once it’s trimmed to the proper shape.
After insert the metal rod and adjusting the length to insure the proper height, I used a few drops of Super Glue to loxk the figure into a fixed position. Don’t glue the rod in place if you’d like your custom to have waist articulation, though. I only did it on mine so that when I began filling in the gaps (as seen in the next step) it would prevent the torso from rotating.

Step 4: Plugging Gaps, Adding Detail
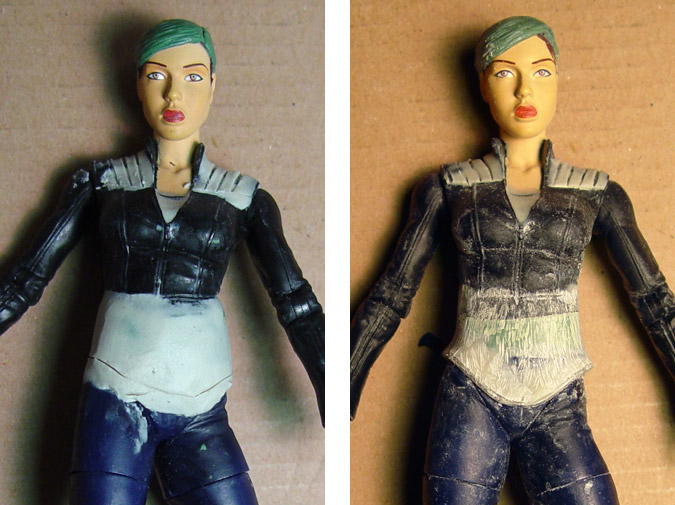
To fill in the gaps and add the appropriate details, I used Magic Sculpt.
This is a two-part sculping medium that goes on smooth if you work in just a drop or two of water as you mix it. Look carefully at the picture on the right, along the base of the corset. Before I added the MagicSculpt, I used a wire paperclip to form the bottom of the corset. This was superglued in place and the MagicSculpt added on top. Once I got done sanding the surface, the clip’s shape re-emerged and gave the corset that piping effect that was needed to reflect the proper fit of the garment.
For getting those little details along the shoulders, I used an X-Acto blade with the blade dipped in water to carve out the ribbing. Then, once the MagicSculpt dried, I sanded off the rough edges and trimmed it to make a crisp, clean edge.
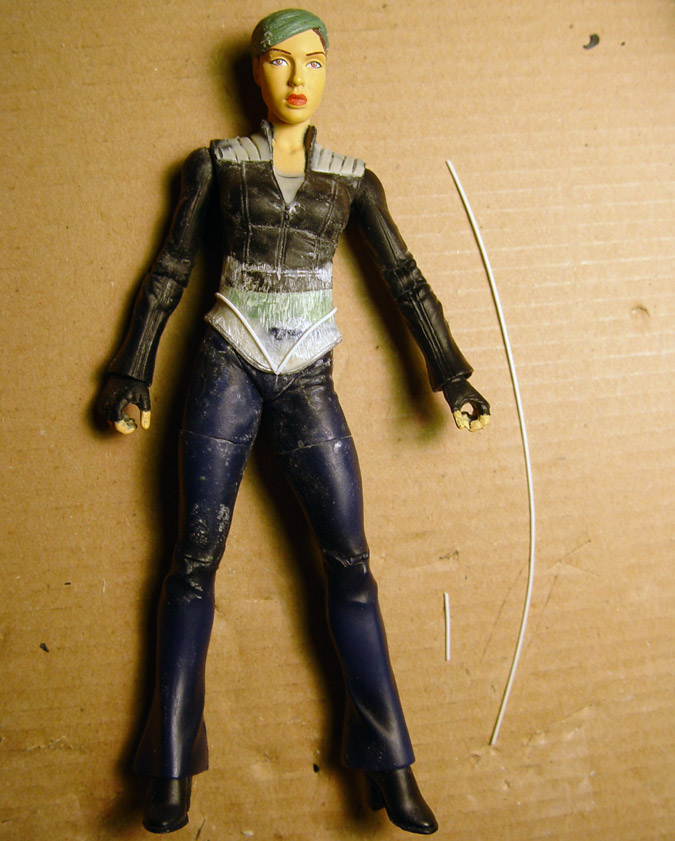
Using half-round strip styrene I went back and added further surface details. This was necessary as Deathstrike’s garments had these incorporated into the design.
Styrene is generally a white plastic found at better art supply stores and hobby shops. It bonds great to plastic using superglue, and sands really well, leaving no crumbly surface bumps.
When using strips as thin as this, just take your time and gently bend the plastic into shape before gluing. The surperglue is harsh to the surface of the plastic, and it might melt/break it if you rush this process. Just take your time and go at a comfortable pace.

Step 5: Adding the Finishing Touches
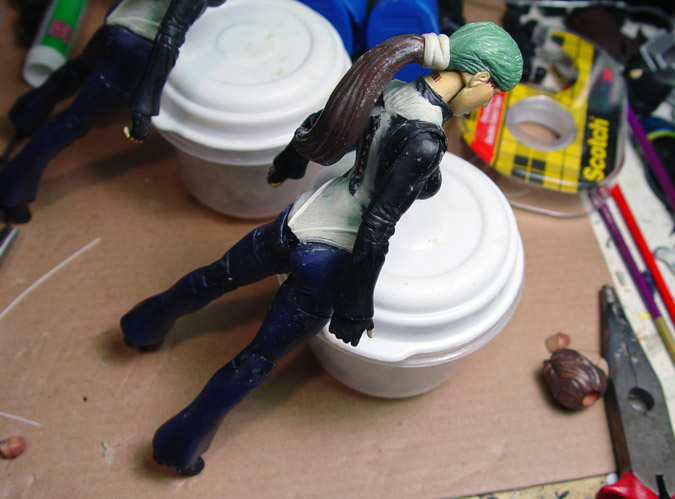
This is the figure as seen from behind. The ponytail came from the Terry Irwin Crocodile Hunter figure I used for my “Killing Joke” Joker custom. I used the metal support pin technique (as seen above in Step 3) to adhere the ponytail to the figure. This would allow me to more easily position the hair for photographic purposes later on. A little Magic Sculpt was added to help hide the seams.
And normally I don’t put a lot of effort into the backsides of customs, since they’re rarely seen, but since this was a gift I wanted to make sure the figure was as accurate as possible. If you look closely along her back, there are the drawstrings of the corset added. This was leftover material from the Dark Angel’s pants legs, and though it’s made of a soft vinyl, I felt it would be far enough out of the way so as to not get damaged. I added a few drops of Superglue on top of it to help strengthen the hold, and to provide a better surface for the paint to adhere to.

Step 6: Priming the Figure
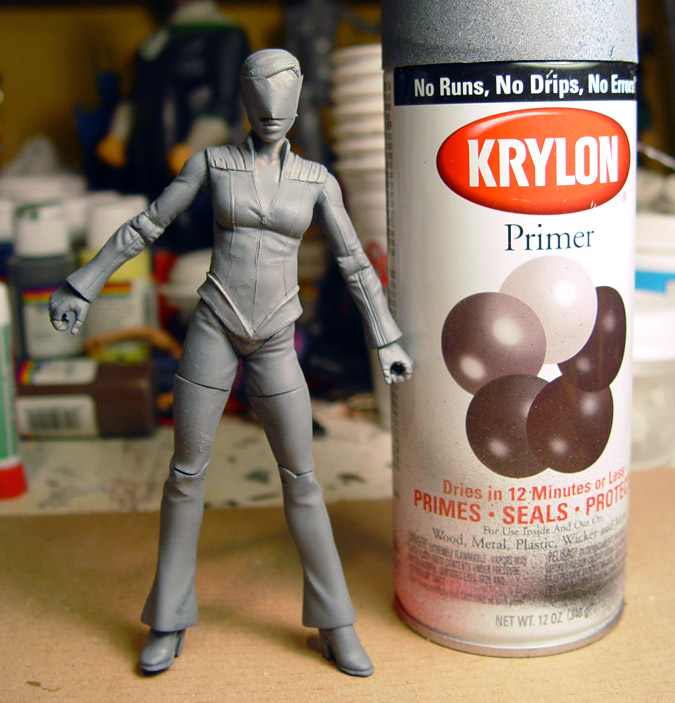
For years now, I’ve sworn by Krylon’s Spray Primer Grey as the first step when it comes time to paint your figure. Though I have since been introduced to alternative forms of priming, I still get drawn to the Krylon. It forms a good bond to the figure and helps the later coats of paint adhere to the custom.
Since I liked how the Dark Angel’s eye were painted, I simply used a piece of Scotch tape to mask off the face, leaving it untouched from the primer.

Step 7: The Base Coat
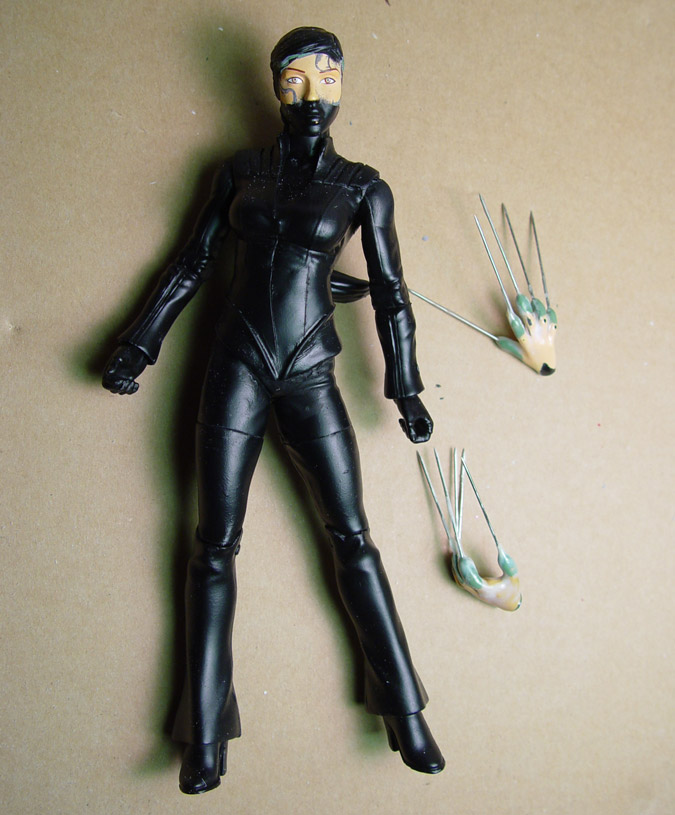
At this point, I usually use Krylon’s Spray Flat Whie on a figure so that the acrylics added later on will appear nice and vibrant. In this case, though, I used Krylon’s Semi-Flat Black, seeing as Deathstrike is wearing mostly black. I opted for a Semi-Flat luster to better mimic both the original custom and the ‘manufactured’ look of a real toy.
Deathstrike’s hands were kept separate to allow for an easier paint application. And besides, they were freaking sharp, so I was tired of jabbing myself.

Step 8: Those Claws…
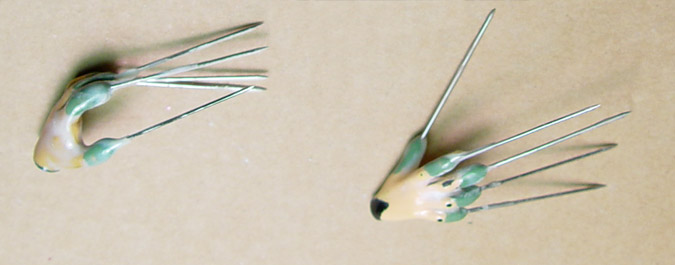
Make no mistake: this was my least favorite step of the entire process. Those hands were a monster to deal with. The claws had to be a certain thinness, yet have a strong enough bond to survive a trip through the mail, and then to survive subsequent handling from the people receiving them.
The first step was to find some appropriate hands that would look dramatic with the claws attached. These took awhile to find, and I’m not sure who they originally belonged to (they were dug up out of a box of spare parts).
I sliced off the fingertips and then superglued metal carpet needles into place, using a thimble on my fingers to help hold the claws into position while the glue dried.
Once the glued was dry, I added a bit of Kneadatite to the seams to help hide the joint, and to also help adhere the needle to the figure (the Kneadatite wrapped around the head of the needle and extended onto the fingers). Kneadatite is similar to MagicSculpt in that it’s a two-part sculpting compound that when cured, sands smooth and adheres to the plastic surface without chipping. I opted for Kneadatite in this case since it is extremely tacky when you work with it, so it adhered to the needles really well (something Magic Sculpt wouldn’t do).
To add yet another level of safety, I then dipped the hands into Alumilite, a plastic compound. Normally Alumilite is used to pour into a latex mold to cast various parts. It goes from liquid to solid in 3 minutes, but in this case I just wanted to dip the hands. By doing so, once the plastic dried it formed a super thin ‘candy coated’ shell that helped hide any surface seams, and basically made it all once surface texture.
The only problem is that it seeped into the crevices between the fingers and made the overall appearance a little clubby. I had to sand these later on, but still, it was the only way to help insure a strong bond on the claws. The last thing I wanted was for any of them to pop off at some point down the road.

Step 9: The Paint
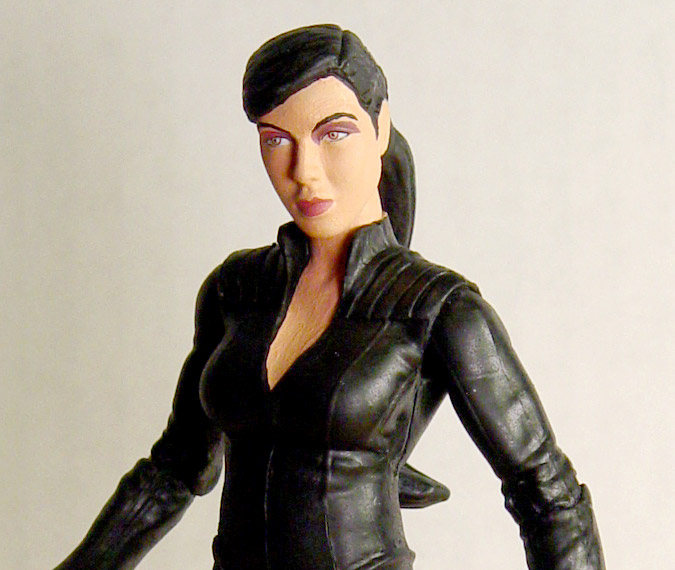
Now, normally I’d be working on a figure that was painted white using Krylon’s Flat White spray. Since the Deathstrike custom was primarily black, and the face was mostly masked off already, it was easier to skip that step.
So, at this point you’ll want to spray the face with a coating of Testors DullCote finishing spray. This will give your paint a bit of surface to adhere to. I used Delta Ceramcoat’s Medium Flesh for most of the face (and for painting customs in general), and then using a super tiny brush, I went in and tweaked some of the details. Just make sure the brush you’re using has a good, fresh tip on it. If you find the hairs splaying out, it’s time to throw away the brush and get a new one.

Step 10: The Finishing Touches
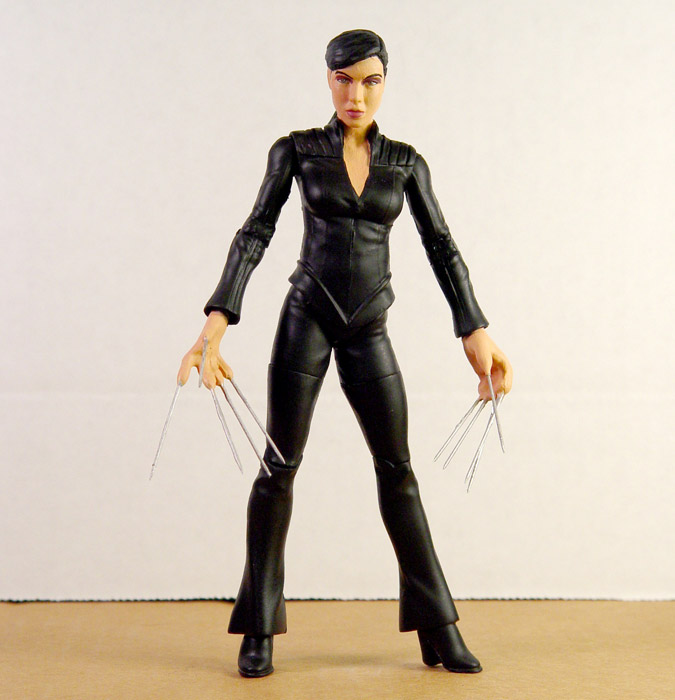
So, now that you’ve got the figure sculpted, primed and painted, the last step you’ll need to address is the topcoat. I can’t stress enough how much I rely on Testors’ DullCote Spray. I’ll give each custom 3-4 coatings of the stuff, which helps even out all the various lusters and gives the custom that manufactured look we all strive for. It also seems to help prevent dust from adhering to the custom, which is pretty important as well.
You should be able to find DullCote pretty easily at your local hobby shop.

Step 11: Packaging
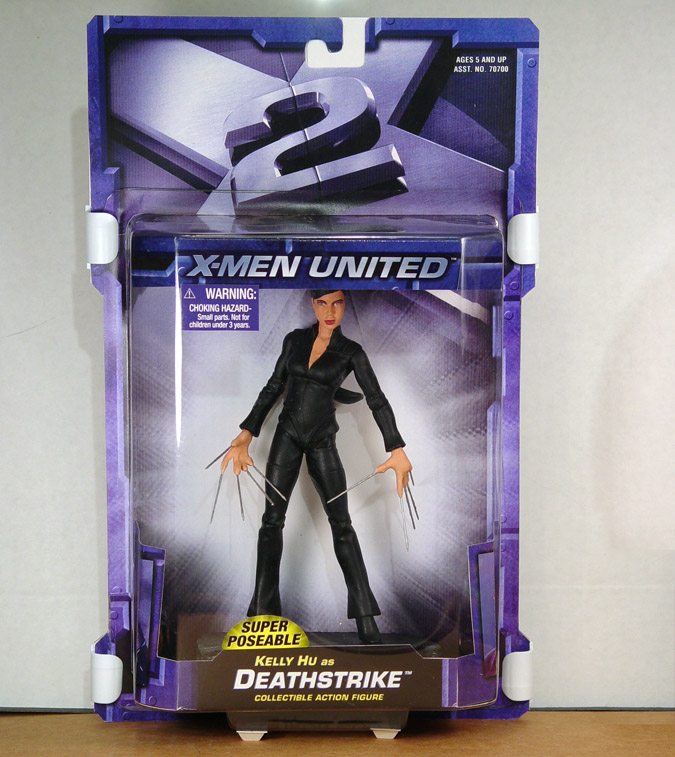
Now this could be its own separate article, but I’ll give you the quick rundown here. Basically the package was designed in Photoshop to mimic the packaging of the X2 figures. Once I got the design to a point I was happy with, I printed out the front on back on a semi-gloss, high quality paper stock and then spray mounted the pages to illustration board for a sturdier presentation. The plastic bubble was recycled from an existing X2 figure, so that saved me a lot of effort.
Since this was a gift, it was key to have the figure and display stand easily accessible and done in such a way so that nothing would get damaged from handling.
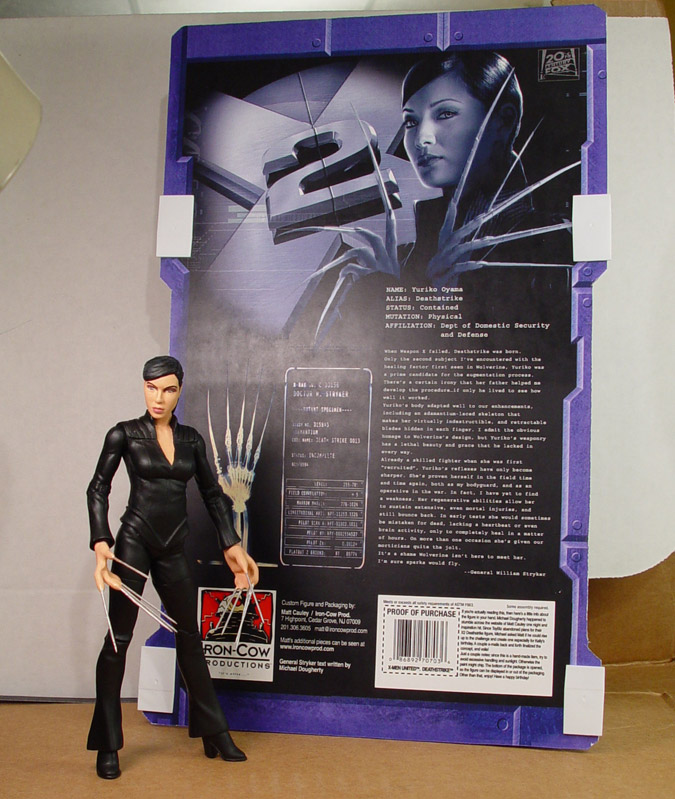
Inside the packaging the figure has a stand that’s adhered to the bottom of the plastic bubble using magnets. Sounds crazy, I know, but it was to prevent damage to the package iif I had used velcro to adhere the base. The bubble is attached to the card backing using some plastic clips I found at a nearby Staples. The clips pop off, and the stand comes off the inner supports, so no glue or twisty ties were necessary to keep the figure in place. Some plastic bumpers under the bottom of the bubble help keep the package standing upright.
All in all, I’m really happy with how she turned out. Both Michael and Kelly loved the results, and that’s what was most important.
Hopefully this will help answer some of your customizing questions. If I left out anything or was unclear on a particular section, just drop me a line and I’d be happy to go into further detail.
Enjoy!
Matt
aka Iron-Cow
