![]()
Have you ever had a custom project where you just needed the head from a specific action figure, but you didn’t want to slice apart the original figure? Well, you might want to give Molding and Casting a try! It’s a bit of a process, and certainly can be messy, but the ability to mass-produce parts goes a long way on saving time and money when making your customs.
The initial materials costs can add up pretty quickly, the amount of pieces you can cast pays for this many times over.

To begin you will need the following (ordering instructions are at the bottom of this page):
- Oomoo-25
- Smooth-Cast 300
- Small clear mixing cups of equal size
- A few larger mixing cups
- Newspaper, and lots of it
- Cake batter spatulas (cheapest you can find)
- Popsicle Sticks, and lots of them
- Disposable latex gloves
- New, unused but cheap disposable round paint brushes
- Nearby garbage can

Got all those items? Good! You are ready to begin…
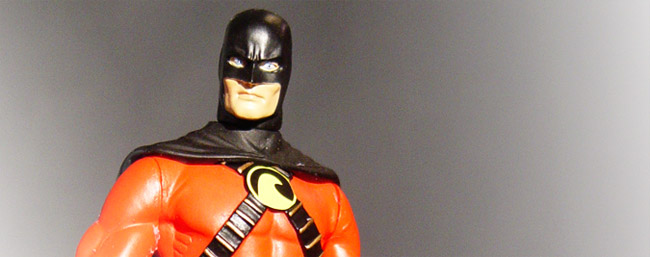
For this example, I am going to cast a DC Direct Red Robin head, although the following instructions can be applied towards almost any character, and almost any body part (foot, hand, hat, leg…)

1. Make sure your figure and work surface are clean
Since you’ll be dealing with a lot of potentially messy materials, make sure you have ample space on your work area and spread out a lot of newspapers. You will be going through a lot of latex gloves, so be sure to have a nearby garbage can handy.
You will also want to make sure the custom figure you are casting is clean. Wash the figure with a warm soapy solution and rinse thoroughly.
Once the figure is completely dry, you will be able to begin the casting process.

2. Making the mold
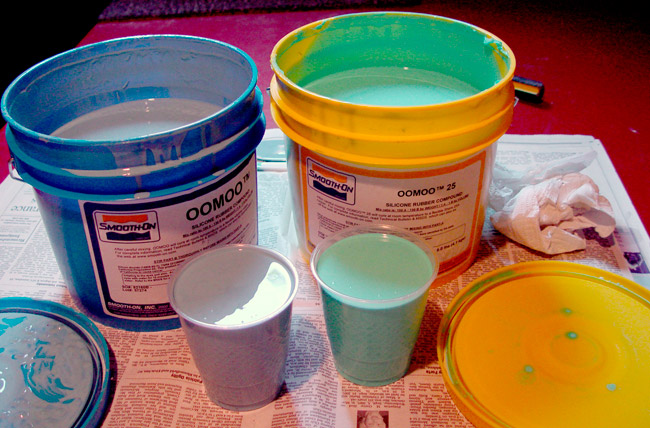
I personally recommend using Oomoo-25 to make the mold. This is a two-component compound that is addition-cured and has a high tear strength yet remains flexible and holds up well. This will allow you to reuse the mold several times over without any degradation.

3. Find a container to house the mold
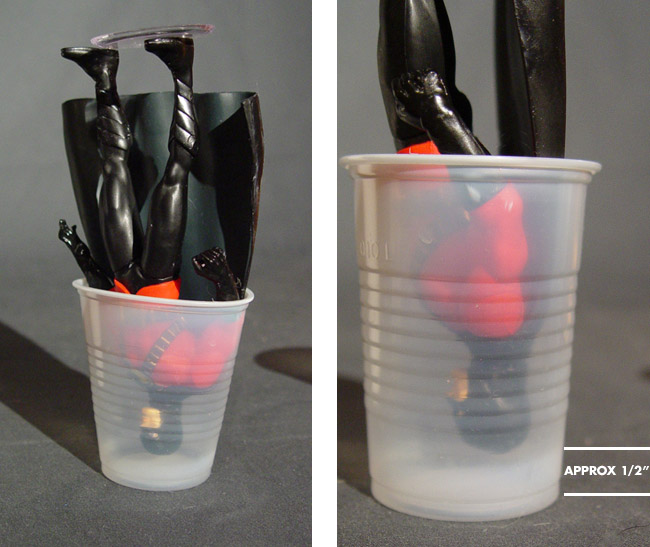
Begin by taking the figure you intend to mold and test-fit it into a disposable plastic cup. You will want to make sure there’s a snug fit, leaving about 1/2″ of space between the top of the head and the bottom of the cup. This will ensure the Oomoo-25 completely encases the head. Any sort of container will work, but I prefer cups simply because they are clear, and you can slice them apart afterwards to more easily remove the mold.

4. Mixing the Oomoo-25
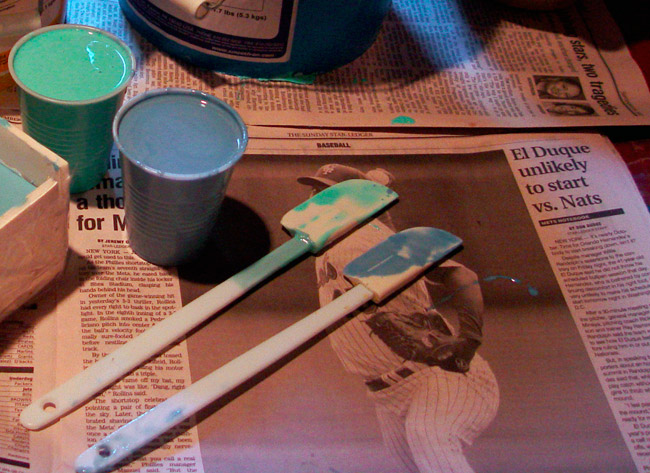
Wearing latex gloves, carefully open the 2 containers of Oomoo-25. Using the cake batter spatulas, stir each of these for approximately one minute until they feel thoroughly mixed. At this point, pour each material into separate mixing cups at a 1:1 ratio. I generally use about half of a plastic cup full of each material, which allows me to mold 4 figures at a time. Start small, as you don’t want to mix too much your first time around.
Once you have the smaller cups filled with equal amounts of the Oomoo-25, transfer each of these into a larger mixing cup to combine them. Stir thoroughly with the Popsicle sticks. Be sure to scrape the sides of the cups to get as much Oomoo-25 transferred as you can.
Mix thoroughly. The blue and green compounds will eventually form a pale purple mixture. I cannot stress enough how important it is for you to mix this completely and thoroughly. If the compounds aren’t entirely mixed, you will be left with an oily, unpleasant mold to work with. Luckily you have a good 20 minutes working time, so you can work at a bit of a leisurely pace. Make sure the mixture is a solid, even color, with no streaks from the bottom of sides of the container showing through.

5. Pouring the mold
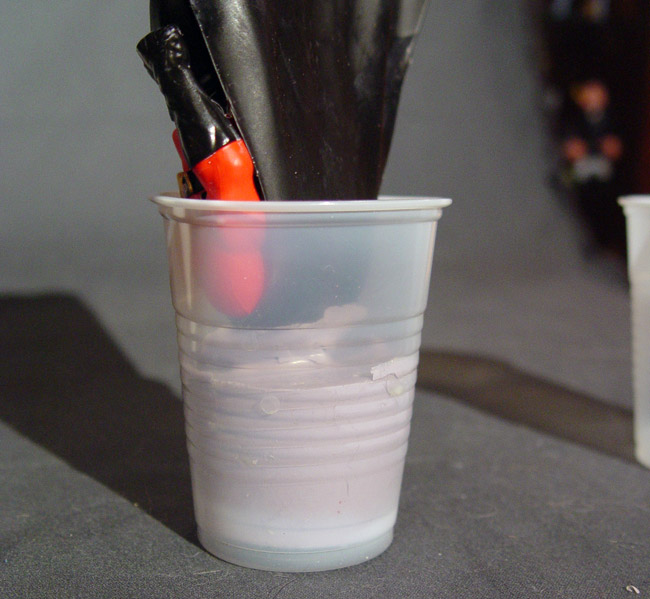
Now comes the big moment. It’s time to pour your mold!
Discard your current latex gloves and put on a fresh pair. This will help prevent your figure from getting any dirtier than it needs to be.
I usually start off by pouring a small amount of the Oomoo-25 mix into the casting cup, enough to cover the head and shoulders, but not so much that it will creep up into the armpit area. I then dunk the figure’s head into the mix, swirling it around a bit. Temporarily remove the figure from the mix and using a soft, disposable paint brush, gently smooth the mixture across the face, checking for any air bubbles that might have developed near the nose, eyes, or mouth. Basically just give it a once over and then return the figure to the mixed Oomoo-25.
Return the figure to the container and remember to leave about 1/2″ of space between the bottom of the cup and the figure itself. It also really helps to angle the figure slightly, so that the figure is face down at a 60-degree angle or so. It’s not absolutely necessary, but you will find fewer air bubbles in your casts. If necessary, pour in additional Oomoo-25 to completely encase the head, neck and shoulders. You will want to partially mold the shoulders, as it will provide you an easier surface to grip once you begin the casting process.
Prop up the figure against a paint can or the wall, so it won’t shift while drying. The curing process usually only takes 3-4 hours, but I recommend waiting at least 6 hours, just out of precaution.

6. Removing the figure from the mold
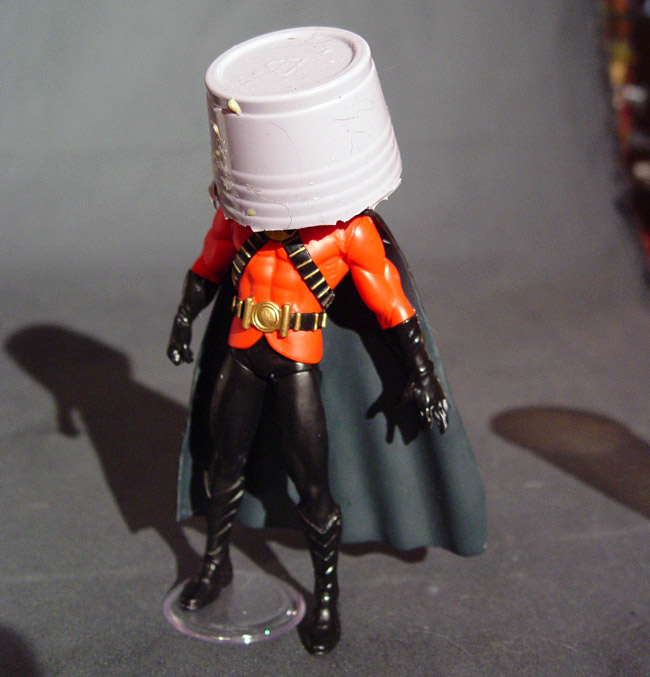
Once cured, you should now be able to remove the figure from the mold fairly easily. You might need to use a pair of scissors and start trimming away at the top of the plastic cup. Once you get a few cuts going, simply tear the rest of the cup away from the mold. You should find it pulls always very easily from the mold.
Removing the figure from the mold takes a little patience, but is also fairly easy. Simply hold the figure around the shoulders and using your thumbs, push away at the mold. The mold should pop away in now time. Keep an eye on the neck joint of the figure. It doesn’t happen all that often, but occasionally you will find the removal process stretches the neck joint a bit. It’s a small risk, though, and most often wont affect the figure if you exercise a little patience when removing the figure.
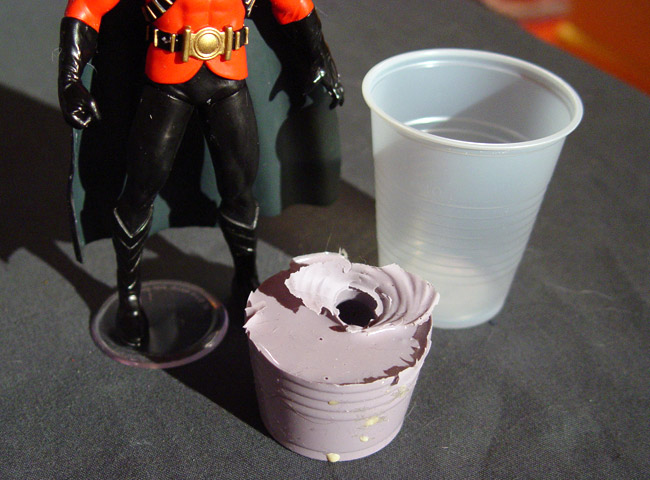
Once the figure is removed, there might be some mild residue leftover on the original. Gently clean the figure again using a warm soapy solution and dry thoroughly. Also, feel free to trim off any loose Oomoo-25 that won’t be needed for the casting process. If it’s in the way, you might accidentally end up having it interfere with your casts.
At this point your mold is complete and you are ready to begin the casting process!

7. Working with Smooth-Cast 300
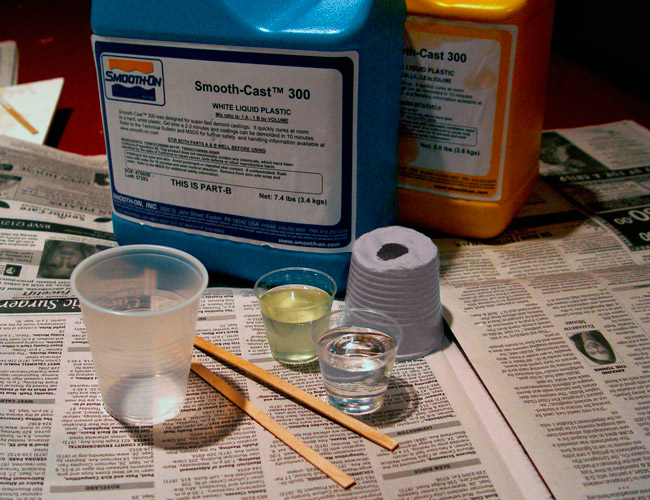
Smooth-Cast 300 offers the casting resins of choice for Iron-Cow Prod. The resins are non-toxic and virtually odorless and generally set up between 3 minutes after mixing.
Change your latex gloves again, and set up your Oomoo-25 products on a clean set of newspaper. Smooth-Cast 300 is similar to Oomoo-25 in that you mix equal ratios to begin the bonding process.
Pour equal amounts of each Smooth-Cast compound into the clear plastic cups. Once these are carefully measured, pour these into a third (larger) container, and use the popsicle sticks to combine.
You need to move very quickly at this point. Holding the mold at an angle (with the character’s face pointed face down), I gently pour in only a tiny amount of Smooth-Cast 300, enough to fill about 1/4″ of the mold. Set the mixture down and gently swirl the partially-filled mold about, allowing the Smooth-Cast 300 to flow over a potential air-bubble spots. I find that if I use the same Popsicle stick that I used to mix the ingredients and use it to press into such spots as the nose, it really helps eliminate bubbles. Working quickly, set the mold back down and fill it with the remaining Alumilite. Gently, but firmly, squeeze the mold in various spots to help remove any trapped air bubbles.
NOTE: the moment the Smooth-Cast 300 mixture begins to shift color from clear to cream, stop what you are doing and let it set. You cannot work the material any more. I do, however, recommend sticking your mixing popsicle stick into any leftover material in the mixing cup, as this will help you pop out the leftover Alumilite once it is dried. Besides, you won’t be able to reuse the Popsicle stick again.
Let the mold sit for about 5-10 minutes and then remove the casting. Be careful, the cast might still be hot (a reaction from the casting process).
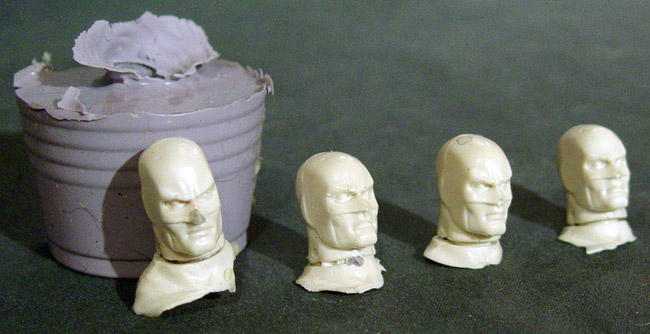
Just so you are prepared ahead of time, chances are your first cast will be a disaster, filled with pockmarks and air bubbles, but this will give you an idea on the problem areas. Try casting the head a few more times and you should find that more often than not, you should wind up with a usable cast. Even still, don’t worry if occasional air bubbles show up. These are usually easy to touch up with a thin application of Magic Sculpt or even a thick application of paint in certain spots.
I know this sounds like an extremely involved process, but the rewards are more than worth it. After you successful cast your first head, I would suggest casting 3-4 figures at a time from then on. While one cast is drying, you can be mixing a batch for a different figure. Besides, as long as you are working with messy materials, you may as well make the most of it.
Hope this helps!
Order Smooth-Cast 300 and Oomoo-25 straight from the source:
http://www.smooth-on.com
